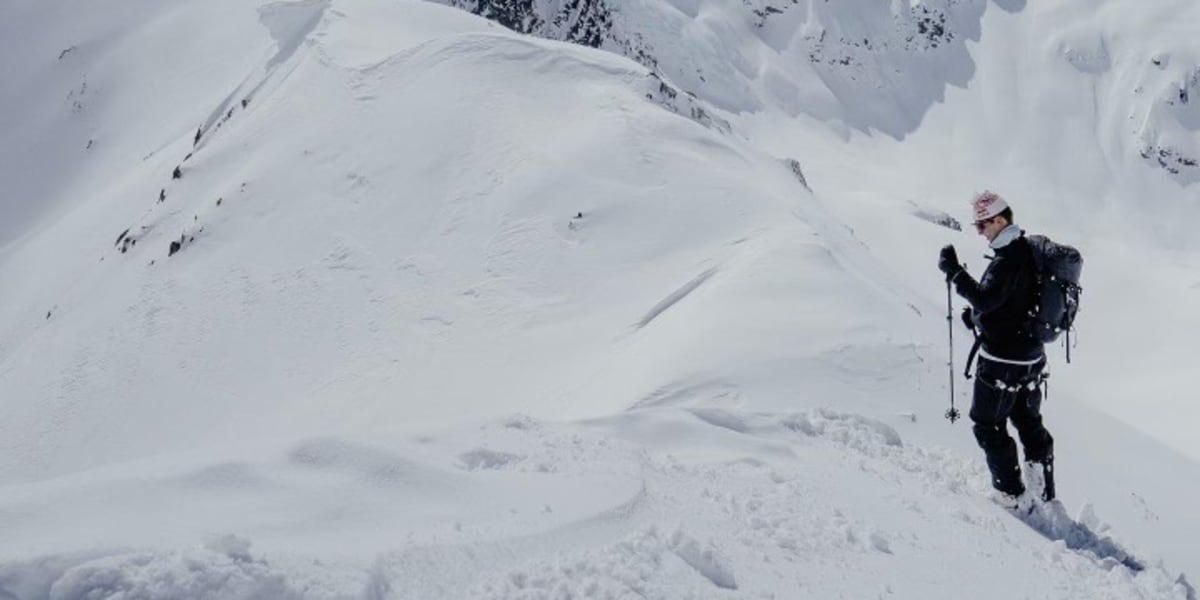
A day on the resort skiing or boarding with friends is a great way to get exercise, add excitement to your life, and spend time outdoors in nature. The ski area is cleared by professionals every morning to ensure it’s safe for the public to enjoy.
There are ropes, signs, and bulletins telling you where to go, what to watch out for, and run difficulty. Overall, the resort is a fairly controlled environment. You don’t have to put a ton of thought into where you go and what you do.
Yet, backcountry skiing is different. There are more risks and more procedures to ensure your own safety. We’re here to help you prepare for a day out ski touring with your friends.
-
Zone – An area where the majority of skiing occurs.
-
Approach – The journey that takes you from the car to the areas where you plan on skiing.
-
Line – A ski run or a specific route you would take down a mountain or face
-
Skin/skinning – A part of ski touring equipment you attach to the bottom of your skis that allow you to walk uphill with your skis without sliding backward.
-
Terrain – The area/s that you ski/ skin on and how it’s shaped.
-
Aspect – The direction of the face of the mountain, which points geographically North, South, East, and West.
-
Objective – A line or mountain you want to ski or summit for the day/trip.
-
Couloir – A ski run through a corridor lined by rock walls on each side.
-
Facet – Weak sugary snow that doesn’t bond well to other snow layers.
-
Bonding – How new and old snow form and connect to each other.
-
Snowpack – Snowpack is the accumulation of snow over the winter season that has built up from the ground. Layers form with every snowstorm depending on temperature, type of precipitation, wind, and other weather effects.
-
Cornice – An unsupported area of snow hanging off the side of a cliff or face. They can range in size from 1 to 2 meters in width and thickness which could be the size of an apartment building.
01
What is backcountry skiing?
Arianna Tricomi skiing among the trees in the Austrian backcountry
© Tobias Zlu Haller / Red Bull Content Pool
Backcountry skiing is the act of skiing outside a ski resort in uncontrolled terrain. You are responsible for getting yourself to the top of the hill, regularly powered by your own two feet.
Occasionally, experienced backcountry skiers use helicopters or snowmobiles to access a zone and then walk from the bottom to the top of the lines they will ride.
However, for the most part, skiers and boarders skin up using their energy to reach their lines. They use their decision-making, planning, and imagination to choose where they walk up and ski down.
Iles’ upbringing and time in the mountains have given him an expert outlook on skiing, terrain choice, and avalanche management, making him one of the best people to advise on how to go about backcountry skiing.
Keep reading to find out what you need to get out into the backcountry with your friends and how you should go about it.
02
Step 1: Get avalanche education
4 min
Shred Hacks Episode 5: How to manage avalanche danger
Learn how to manage avalanche risk with snowboarding legend Xavier De Le Rue.
Avalanche education is the first step to keeping you safe in the backcountry. Start educating at least one month before your trip, so you’re well acquainted with the terrain and safety measures. Once you have at least the first stage of education (in Canada, it’s the AST 1), you will understand several safety elements. These include:
Once you have the initial education, you will have some of the tools to keep you safe during backcountry travel.
“I won’t go out into the backcountry with partners that have not had basic avalanche education. Being able to trust your partners is crucial to safe backcountry travel,” says Iles.
03
Step 2: Find a reliable crew
When you’re backcountry skiing, it’s extremely important to have reliable and knowledgeable partners. You’re responsible for each other’s lives while you’re out skiing, so find the right partners who you can trust to be knowledgeable, aware, and willing to speak up is undeniably important.
Whenever you are ski touring there should be a constant conversation between you and your partners on what is going on in the snowpack, potential hazards, and general fitness or fatigue levels. You are each other’s lifelines out there.
If there is an avalanche or an injury, you need to be sure you can rescue each other and get each other help.
“In the group, I want people who ask questions, who suggest other route options and can have an honest conversation about the snowpack and terrain choice. They have to be knowledgeable and educated while being risk-averse. Lastly, I need to be able to trust them,” says Finn.
04
Step 3: Decide on your location and objective
Choose where you’re travelling and planning to ski. Location is important.
This decision can be made anywhere from a week out to the day before. If you are willing to nerd out on weather patterns, wind direction, and potential snow accumulation, you can spend hours trying to predict the best spot to ski for the day.
If you’re travelling regionally, you can check the forecast and cross-reference different forecast systems. But the most important forecast to check is the avalanche bulletin for the area to determine the safest places to ski.
However, before you start checking forecasts, you need to consider who you are going with and how well you know the area. Adventure is fun, but if you are new to the sport it’s best to go with someone familiar with the area.
05
Step 4: Look at a map of the area
A map of the Tatshenshini-Alsek Provincial Park in British Columbia
© Scott Serfas / Red Bull Content Pool
Once you have decided on an area or zone you plan on riding, it’s a good idea to look at a 3D map of the area. Check out the topography, potential up routes, ski lines, and backup plans. Take note of areas with overhead hazards, areas susceptible to avalanche activity, convenient approach routes, emergency exit routes, and potential extraction points for helicopter rescue.
Have an understanding of the area so that during your decision-making processes, you can discuss potential issues that could come up and where the best skiing will be if you hit it right.
“I always go out with a plan of where I am going and what our objectives are. This dictates how much food and water to bring, specific gear, and what emergency equipment is required if something were to go sideways. My favourite zone is the Duffy Lake area. Depending on where you go glacier travel gear and crevasse rescue training may be needed. It is important that everyone is prepared for the worst-case scenario and can help perform a rescue and extraction if necessary,” Iles says, explaining the importance of a solid plan understood by everyone in the group.
06
Step 5: Check the weather forecast
A group of athletes prepare for the descent during a snowstorm
© Christian Gamsjäger / Red Bull Content Pool
Look into the weather forecast to predict snow accumulation and weather for the day you are skiing. If you see warming in the forecast with lots of recent snow, it can create poor skiing and potential avalanche risk.
A cold and dry week before your trip, with snow forecasted the day of your ski tour could create a surface hoar layer in between the new snow and the layer below. This creates a weak layer where storm snow has not bonded to the layer below. When this happens it creates an easy sliding surface for the storm snow to release from, spurring the potential for avalanches.
Know the forecast for the day you’re going out and understand the potential for clouds, precipitation, or blue sky. Navigation can become difficult if the visibility disappears and you cannot see landmarks.
07
Step 6: Make a trip plan
5 min
How to plan your first tour
Xavier De Le Rue has advice to make that first tour go a lot smoother.
Flexibility during ski touring is key.
“It’s crucial to be able to change on the fly and make safer terrain choices if conditions don’t permit the original plan. Not having a backup plan or an alternate route can put you in dangerous situations if red flags are ignored,” says Iles.
08
Step 7: Check the avalanche forecast and bulletin
5 min
How to act in the event of avalanche
Xavier De Le Rue gives vital advice on how to act in event of avalanche, which is possible when freeriding.
They have an interactive map showing regions and current danger ratings. Within each region, there is a bulletin, a three-day forecast, snowpack problems, a snowpack summary, and min reports. Before going out, it is important to have a firm grasp on the current problems in the snowpack and which aspects they may be prevalent in.
Before departing on your trip, make sure your beacon, safety communication, and headlamp have batteries.
On top of the essential safety pieces, it is crucial to have food and water. Iles’ favourite ski touring snacks are Baby Bells and pepperoni sticks with a Red Bull for extra energy in the afternoon.
There are also some pieces of gear that many people new to ski touring wouldn’t always think to bring. For example, extra socks, gloves, a super puff, and a spare base layer can be useful.
Iles says, “People who are new and figuring out touring wouldn’t normally think of bringing some extra things like socks and gloves. But packing a little extra and having a slightly heavier pack can make the day a lot more comfortable. Especially if things don’t go to plan and you need to sit tight for a bit. The super puff goes a long way!”
11
Step 10: Double check your equipment
There’s nothing worse than getting through three-quarters of your approach and having your toe piece fall out of your ski or a clasp falling off your boot. Check things like binding bolts, skin clips, pack zippers, headlamps, and transceiver batteries, and make sure your avalanche rescue tools are all in good working order.
If you are in the backcountry with faulty equipment, it can put an unnecessary burden on your group and other groups around you. This can cause you to spend an unexpected night in the backcountry or worse. Make sure to check your equipment regularly before you head out into the backcountry.
The time has come to make a coffee and head out. Start skinning up the approach and into the untamed terrain of the backcountry. If you are new and just starting, try and bite off small tours with easy bailout options and less complex terrain. As you gain more experience, you can venture further into the unknown and partner with more experienced skiers and boarders.
Remember, you are always learning in the mountains and they are one of the best teachers. But they can teach lessons the hard way.
Mountains demand respect, and it should be given.
13
The importance of the avalanche forecasting system
For a more in-depth understanding of the avalanche forecasting system, let’s break down some of the potential problems and why they might happen.
Problems can arise at anytime
Problems can occur in some aspects and not others. Depending on the weather systems, wind direction, temperature, and solar radiation, the snowpack can change from face to face.
Wind direction can change the snow from aspect to aspect. It can move snow and deposit it on other areas of the mountain, creating wind slabs and weak points in the snowpack. Wind also builds cornices, which can create issues travelling through complex terrain and finding entrances into a line. The overhead hazard of a cornice breaking and triggering an avalanche below is something to be diligent with while travelling in the backcountry.
The sun can have an effect on how aspects react and form the snowpack. North-facing aspects in British Columbia regularly hold shade for most of the day. This means the snow temperature stays cooler, keeping the snow bonded and chalky.
On south-facing slopes, the snow is susceptible to rapid warming and cooling, creating wet and loose avalanche opportunities and crust layers from the freeze-thaw cycles.
Overhead hazards should be kept in mind when travelling through avalanche terrain. Always be aware of what can come from above. When travelling uphill, it’s hard to respond quickly to avert hazards that can release down onto your group.
Be aware of slopes that could slide above you. Cornices, rocks, and other groups can trigger avalanches that can bury you while you travel up and downhill. Always give a wide berth to overhead hazards.
Changing snowpack at different elevation bands
Different elevations can have different snowpacks and problems. Due to different freezing levels during storms, the amount and type of precipitation that falls can differ depending on the elevation band.
Persistent weak layers can be difficult to navigate. They are normally buried deep in the snowpack and can become dormant for extended periods. However, they create a low probability, extreme consequence scenario.
There is a low probability of a very large avalanche, but the possibility is still present.
The navigation of this problem relies on how comfortable your group is with the scenario and communication of the excepted risk tolerance. Groups should make conservative terrain choices when there is a persistent weak layer problem.
A wind slab is a pocket of snow, sometimes isolated or widespread, where snow has been collected and deposited by the wind. It can be densely packed and pressed or deposited loosely for great skiing. The bond with the layer below can sometimes be weak, leaving possibilities for avalanches depending on the layer below.
A storm slab consists of snow that has fallen from a storm. This snow is regularly light and fluffy, making for great skiing. If the storm comes in warm, it can create a thicker slab of snow that adds a lot of weight to the snowpack, potentially triggering avalanches on weaker layers of the snowpack below.
A snowpack summary is a summary of all the layers of snow, the dates each layer occurred, and what weather event created it. You can track these layers from the ground up and they are labelled with their density.
To determine the density, you can try pushing with your fist, four fingers down to one finger, a pen, and a knife to determine how firm each layer is. They can give a lot of information on the snowpack and what has the potential to slide.
Stay educated on the snowpack
Continue to gain knowledge on what is going on in the mountains. Different retail outfitters and user groups have monthly snowpack seminars uploaded to YouTube to help the public stay up-to-date in an easy-to-follow format.
The wealth of information from field experts is crucial to staying safe in the backcountry. In these sessions, experts explain problems in the snowpack, where you may encounter them, and how to avoid them.
14
Work towards a long backcountry career
Overall this is a pretty in-depth overview of how to prepare for your first-day touring. The information should be used as a guide and a legend to the knowledge that you will acquire through the season.
If you feel uneasy about a face or a slope, it is okay to back off. These decisions should be celebrated the same as successful missions. It can be hard to turn away. But, every time you go out, the goal is to come home at the end of the day alive and unharmed.
Part of this story


